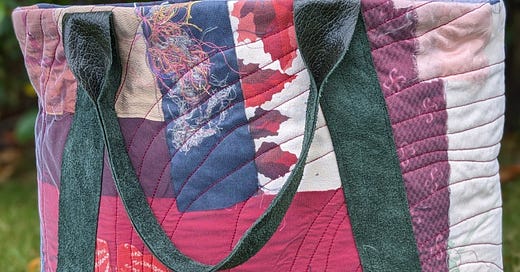
Hot on the heels of my recent post about the Closet Core free tote pattern, I’ve made a second one already! This time using vintage kimono silk remnants, kindly gifted to me by my friend Moira. I’ve mentioned Moira before on the blog, she had a huge collection of vintage kimono she’d curated whilst living in Japan in the 70s and 80s. I wrote about this beautiful collection over here, after helping Moira rehome most of them to the Museum of Scotland and the V&A Dundee.
A collection of vintage kimono
My pal Moira, of allotment share fame, used to live in Japan in the 1980s. She taught at a university and whilst she was there, she amassed a collection of vintage kimono. Some of them were beautiful, iconic pieces designed for special occasions, like wedding dresses and formal wear. Others were day-to-day items, designed to be worn round the house or t…
She also let me share her allotment with her briefly, before we moved up north. She’s a real crafting fairy godmother and I hope to become a Moira some day to the younger generation.
This particular project was inspired partly by Deborah of Dastardly Line, and her amazing studio in Glasgow working with textile waste. She uses a long arm quilting machine to produce incredible recycled fabric, and then repurposes that fabric into a range of super stylish bags. I’m lucky enough to own one of these bags, and it’s constantly being complimented. I was also inspired by last season’s Sewing Bee episode, on the Reduce, Reuse, Recycle theme. In this episode, they used a thin mesh to create an envelope, which they then stuffed with scraps and quilted to form a fabric. They then transformed the resultant fabric into a bag.
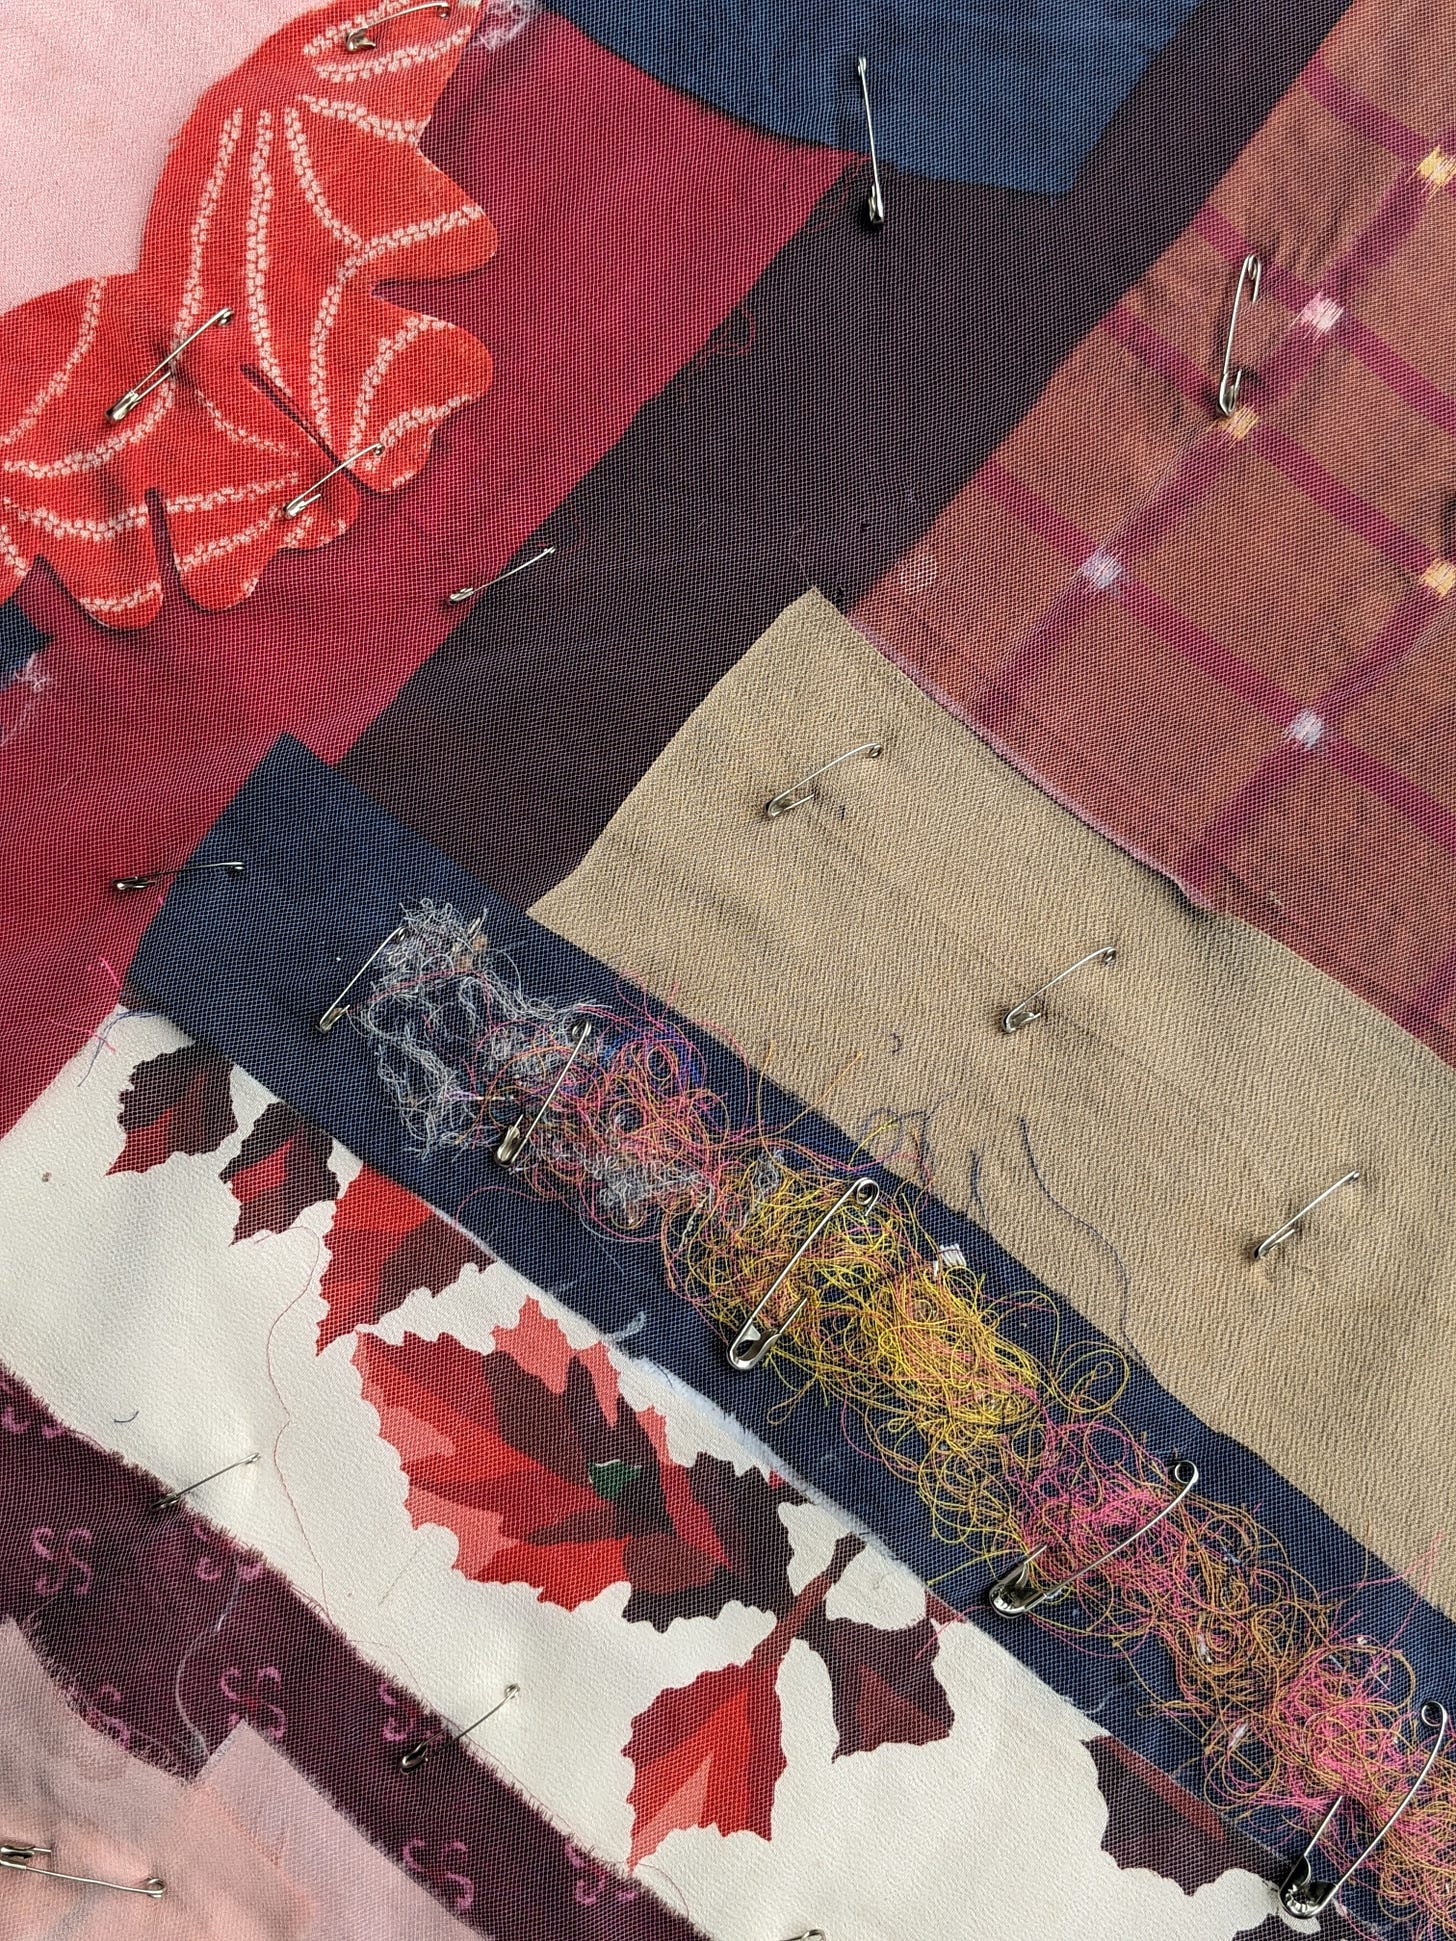
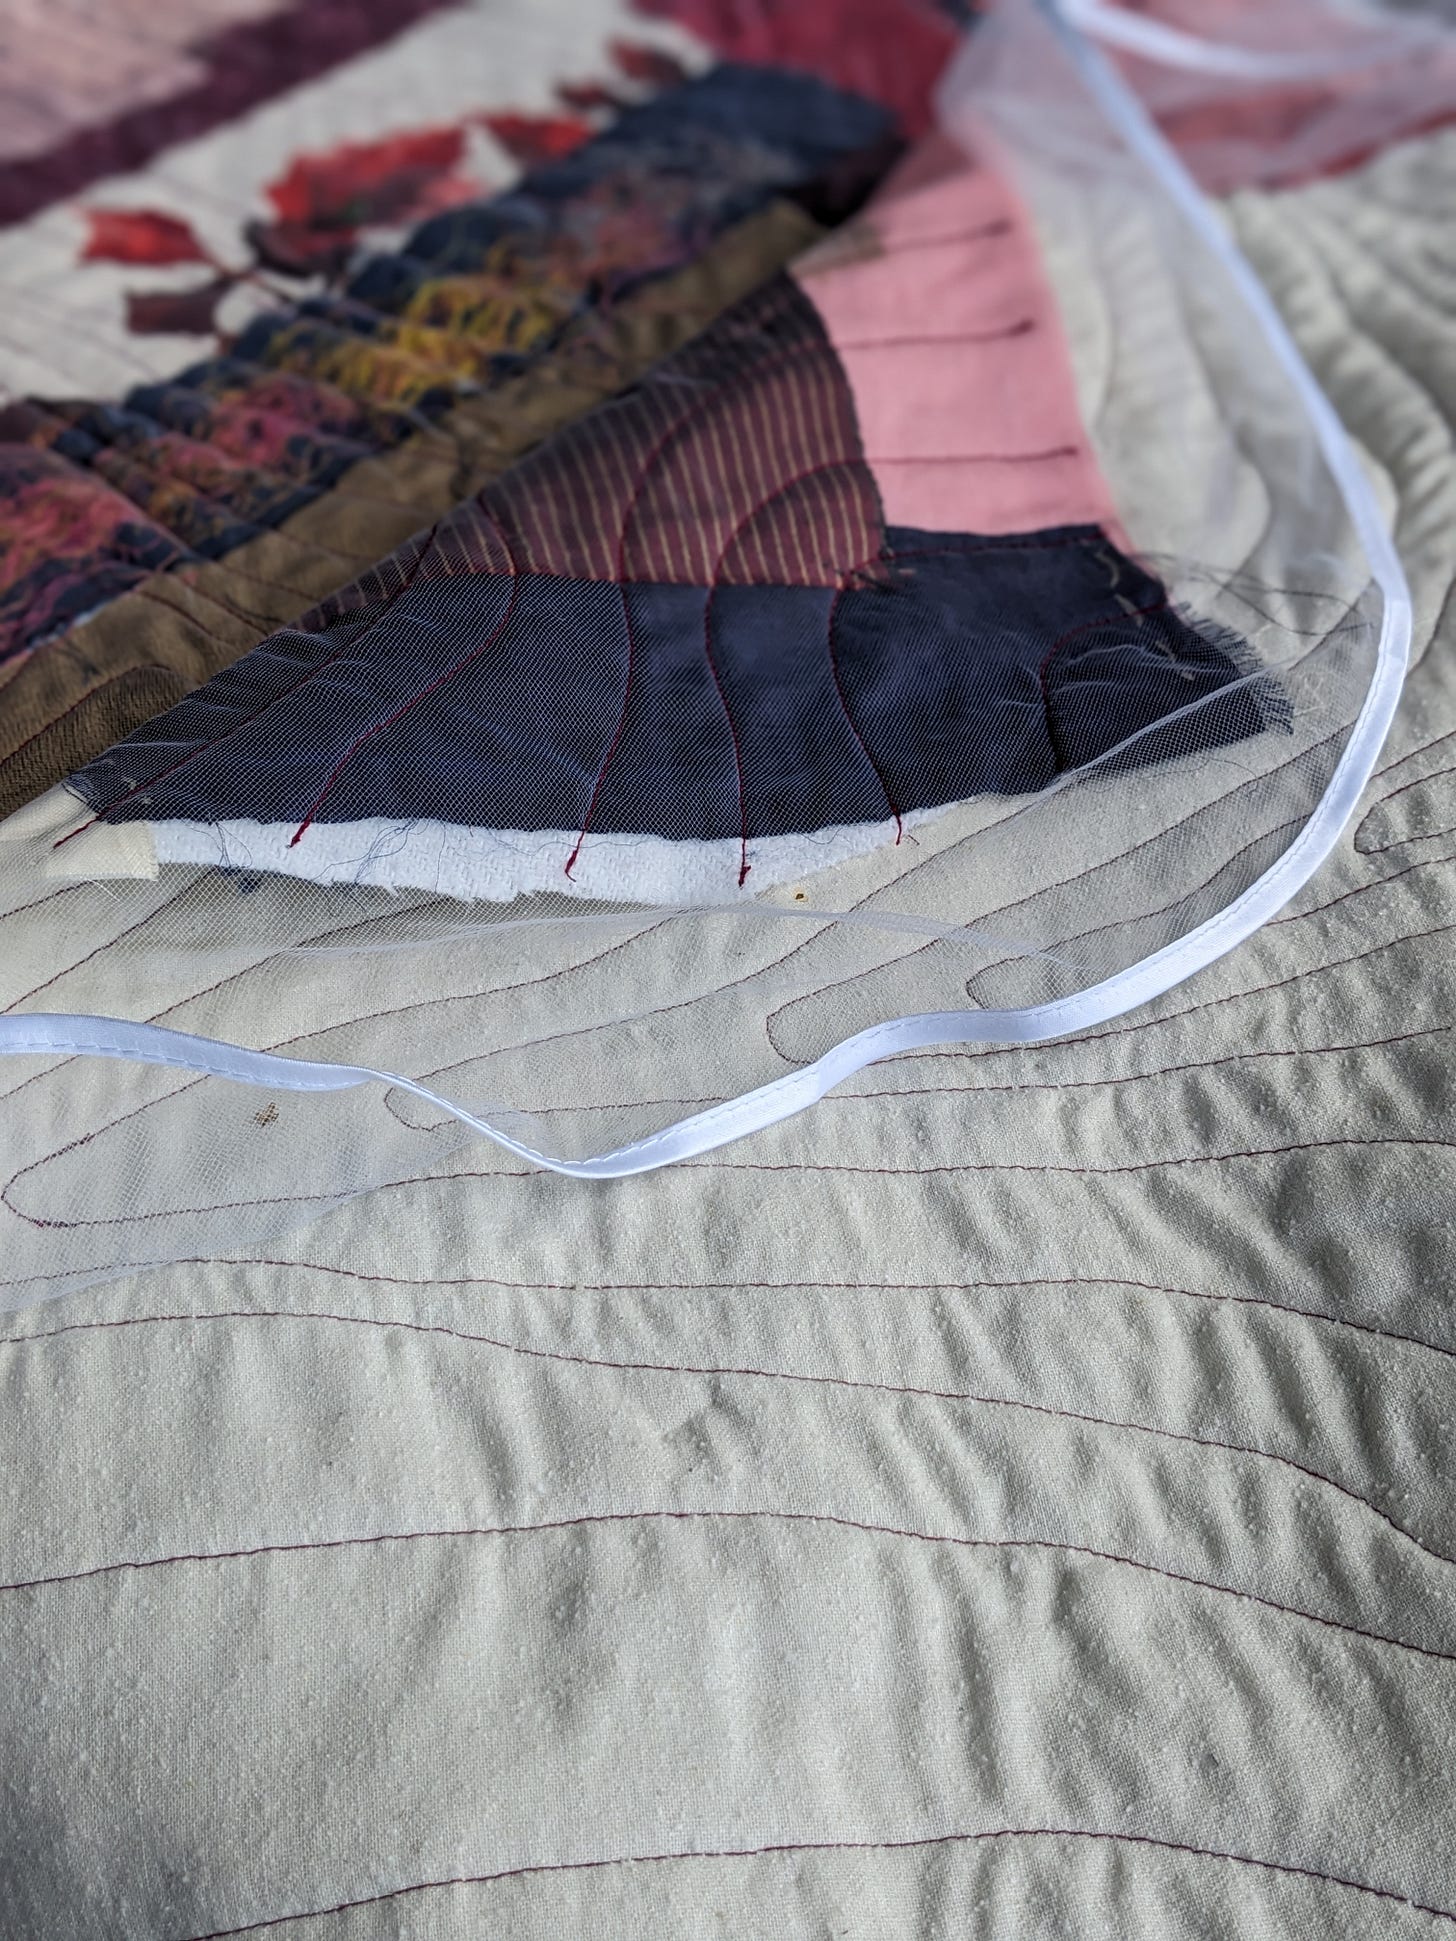
I loved this idea and had a whole crate of kimono silk remnants from Moira I thought I could put to this exact use. I sorted through and pulled out all the colours I wanted to use, sticking to a rough ‘autumnal’ colour theme. I also sorted out a bag of scraps to donate to my knitting club, for the people who also sew. I thrifted a second hand wedding veil off Vinted for £5, found a large piece of cream brushed cotton in my stash and I was good to go.
I ironed all the scraps and laid them out on the brushed cotton backing material, in a random design that looked aesthetically pleasing. I took my time to move bits around, making sure the brushed cotton was as covered as possible and the scraps overlapped. I knew some movement would happen during the quilting process, so I wanted to minimise the amount of backing fabric that might ultimately end up peeking through. I used safety pins to hold everything in place, including a thrifted wool batting layer, salvaged from an old blanket. Safety pins work well for this stage, since pins can shift and fall out as you manipulate the fabric. I added some thread from my overlocker bin for good measure, since the colours matched my scheme. It’s a historical artefact of my sewing projects from that time period.
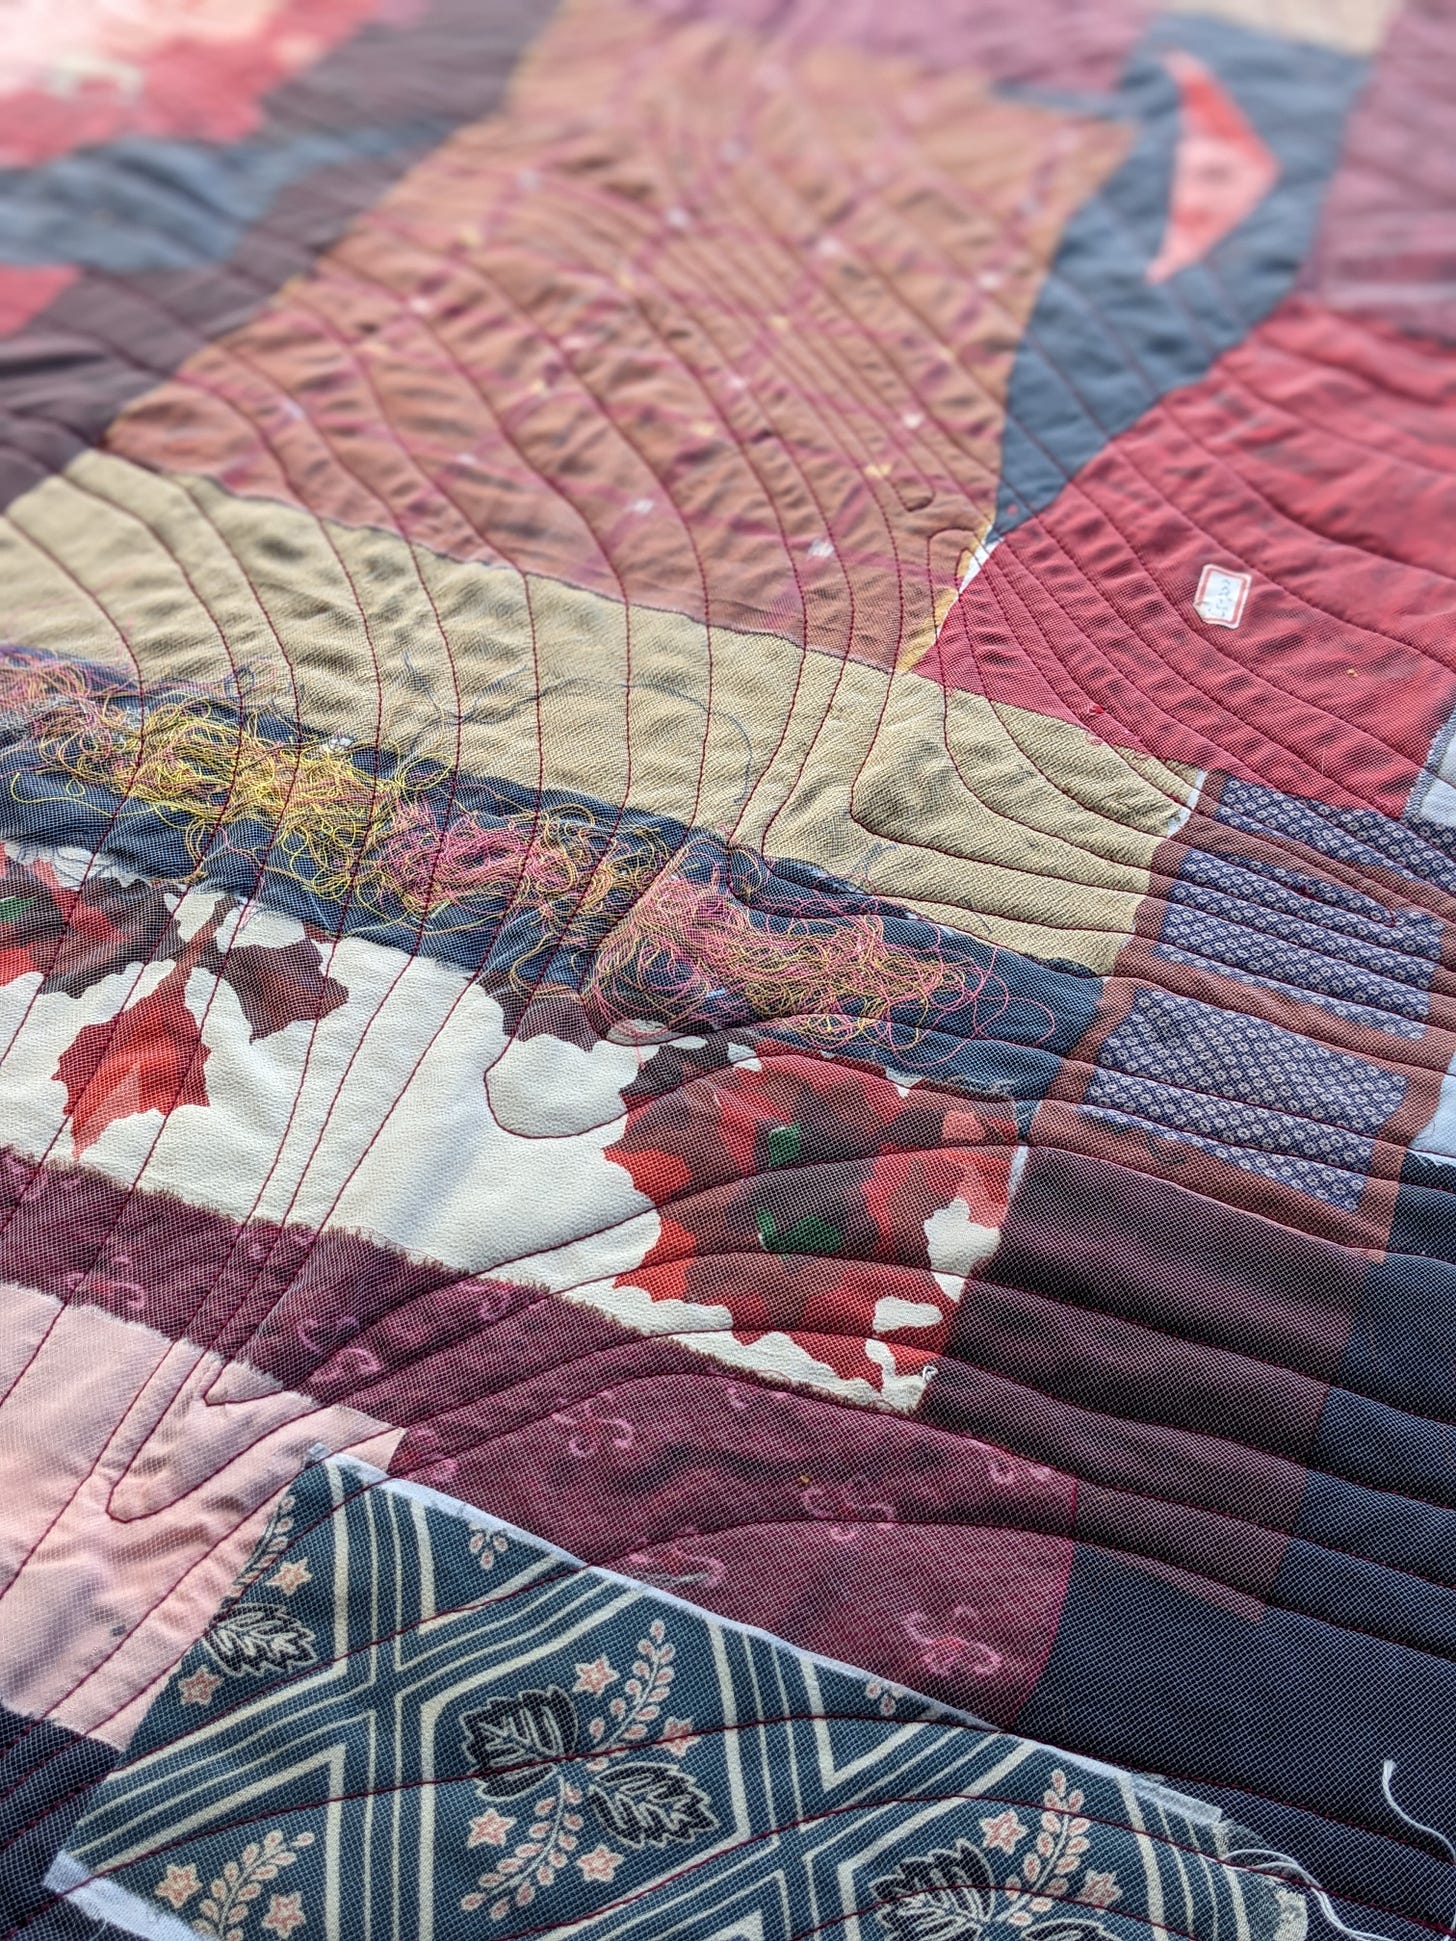
Once I was happy with my scrap combinations, I laid the netting over the top and started quilting. I chose a thick burgundy thread for my topstitching and a coordinating purple for the back. I knew the thread would sink into the brushed cotton and the colour would be less obvious, but I didn’t want a cream or white thread that might show through on the opposite side, if my tension wasn’t perfect.
It took a long time to quilt, I’m not gonna lie! I used an organic design, similar to Deborah’s topography design I love. I utilised a similar freehand style on my recent quilted ironing pad, and I love the natural design. It’s also much easier to look intentionally wonky, when it’s a doodle style and not straight lines. I knew I would find straight lines harder to keep uniform and the risk is ending up with something that looks obviously handmade. The scraps mostly stayed in place, with some minor movements I could correct as I went.
Once the fabric was quilted, I took several weeks to pluck up the courage to cut into it. It was so pretty, and I was so pleased with it, I was worried if I cut into it and spoiled it somehow, all those hours of labour would have been for nothing! This is why I did a practice run of the Closet Core free tote bag beforehand, using tartan wool salvaged from a pair of curtains, and green thrifted leather for Andrew’s cousin. I knew the bag was a fairly straightforward sew, which took the pressure off the pattern and allowed the fabric to shine.
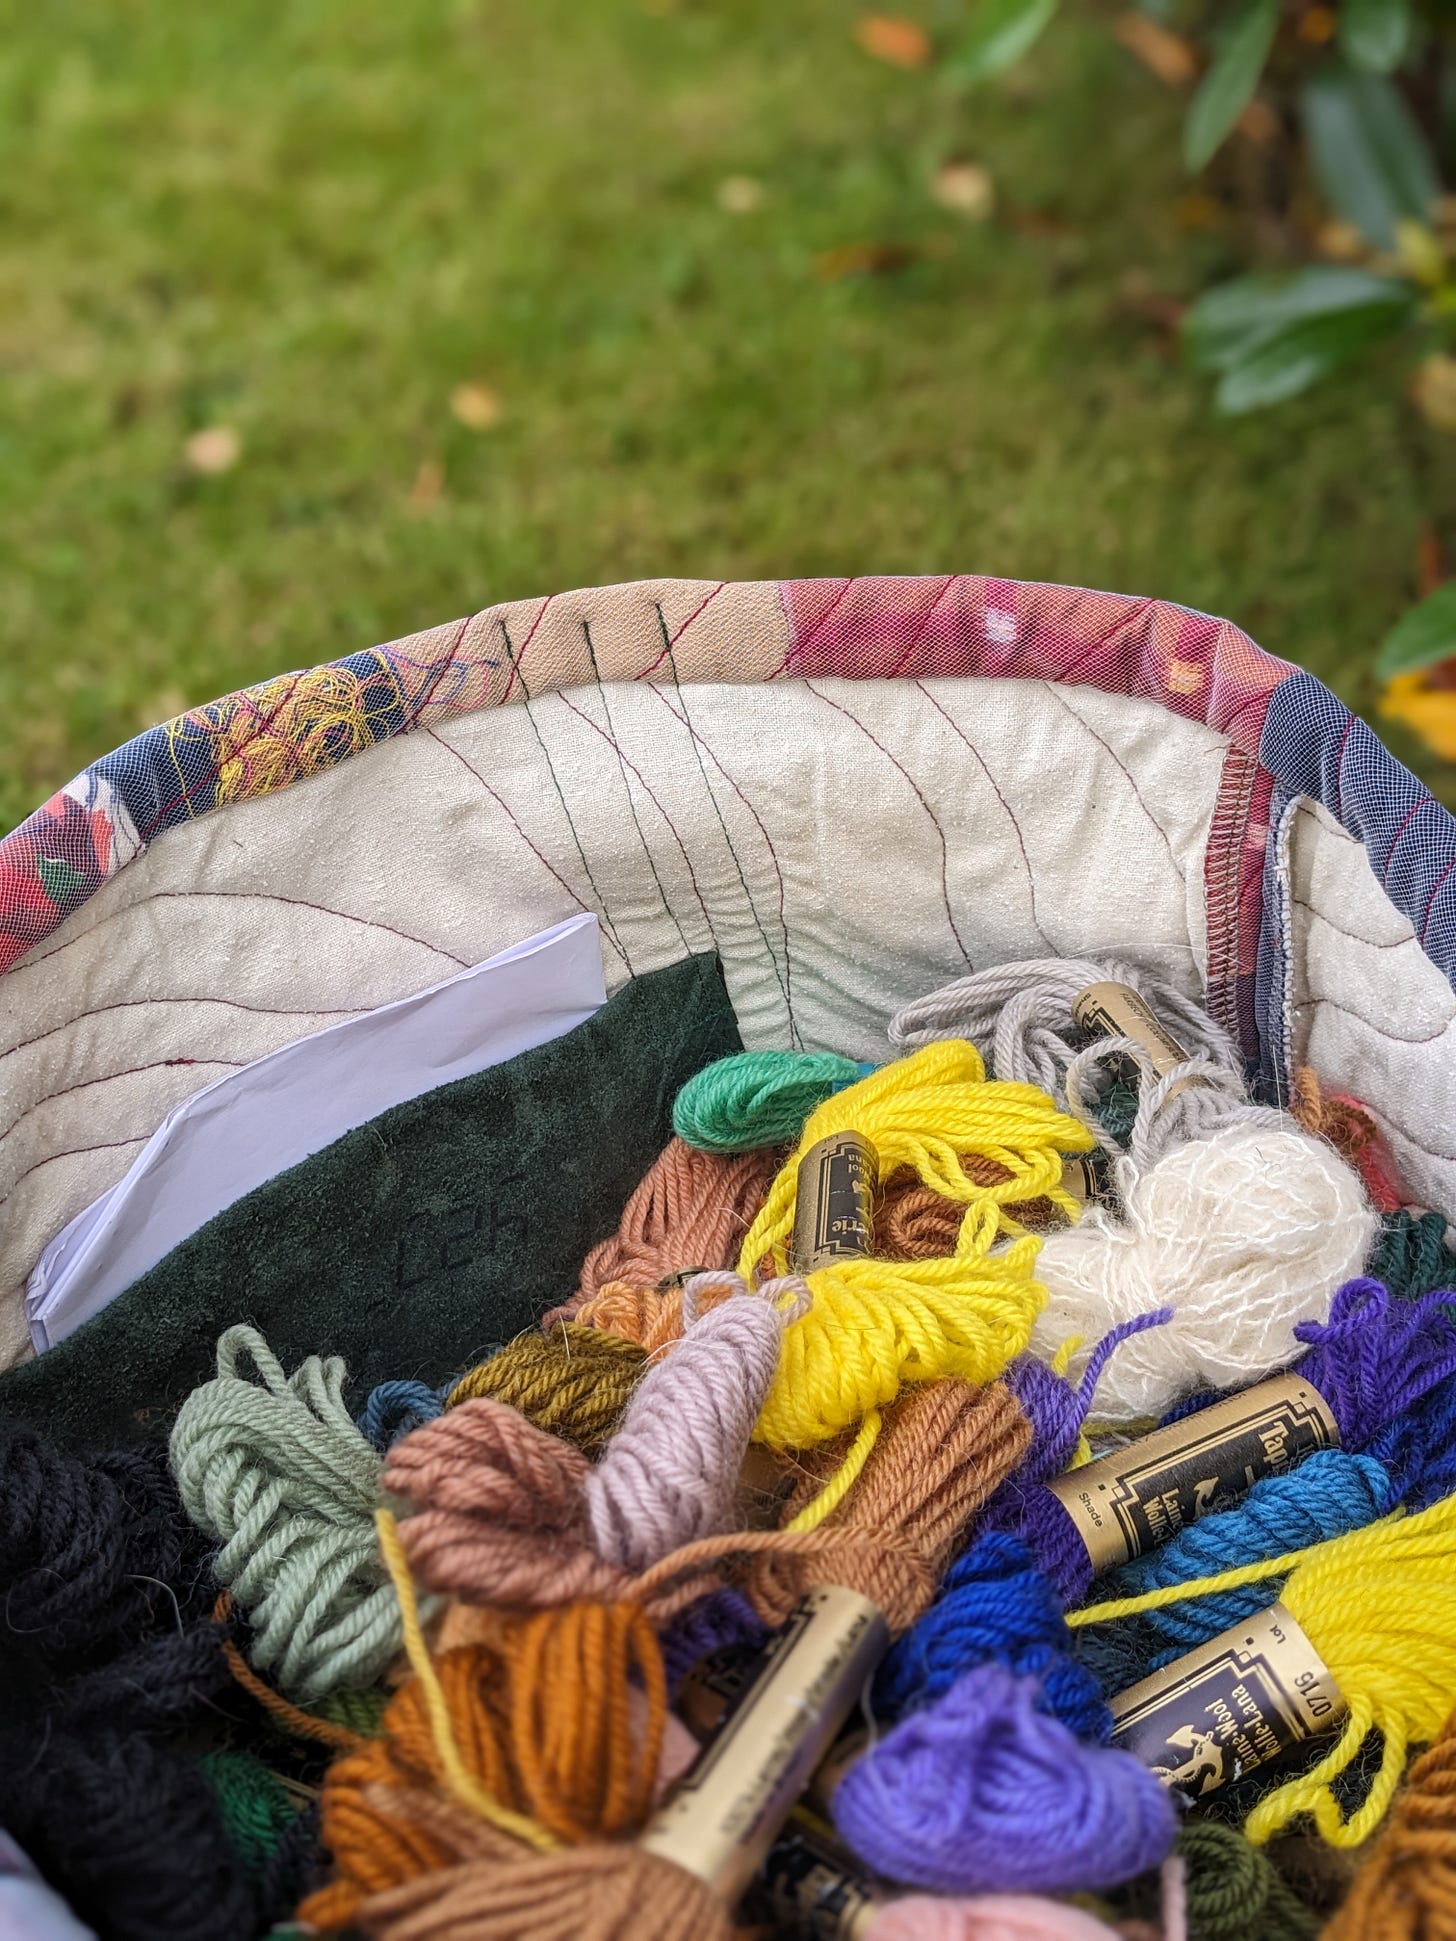
I moved the external pockets to the inside of the bag, so as not to obscure too much of the quilted fabric. It seemed a shame to spend so long quilting it, only to cover it up with green leather pockets. The pockets are super useful, so I didn’t want to lose them altogether. I moved those pattern pieces to the inside of the bag, catching them in place as I sewed the handles, as the instructions dictate.
I absolutely adore this bag! You can tell because I’ve put so many photos in this newsletter, it will probably cut off the bottom for you! If you want to see the remaining photos, just click the link at the bottom. I love the simple but practical design of the tote bag, and the structure the leather and the thick quilted material give the overall look. The internal pockets are super practical, as are the leather handles. The green thrifted leather compliments the autumnal colour palette perfectly, in my opinion.
I used a jeans button to tack down the corners, giving the bag the classic square-bottomed look. My machine was never going to manage to sew through multiple layers of leather and quilt. I don’t love the way the material folds around the jeans button, but it’s probably less obvious in real life, compared to these photos.
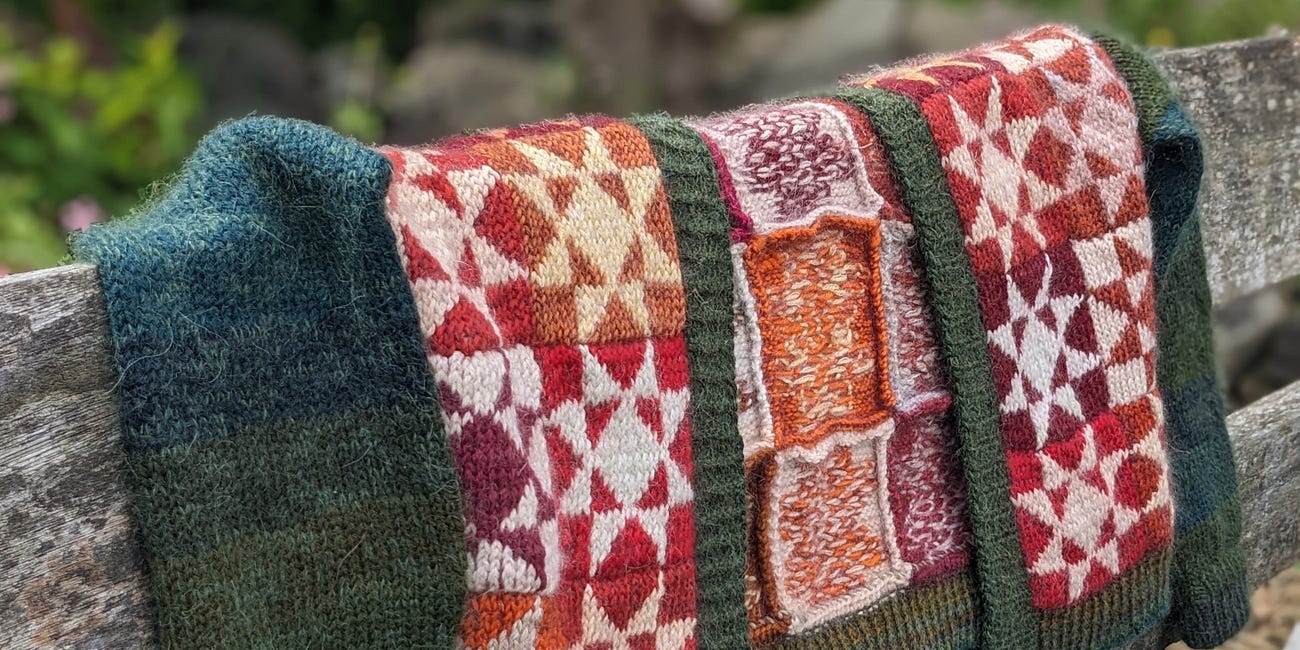
Currently I’m using the bag to house a big knitting project (another Heirloom Quilt cardi, this time for my Mum), but I love this bag enough that I would happily use it as a tote bag. It doesn’t obviously scream ‘project bag’, I could use it for a day trip or to return library books or pick up groceries.
Heirloom quilt cardigan by Katryn Seeburger
A few months ago, I wrote a blog post about a gift of fabric, yarn and notions given to me by a friend of a friend, clearing out a relative’s house. In amongst the treasure was an entire box of tapestry yarn. I see this yarn all the time in charity shops, often in large quantities, but hadn’t thought to use it until fairly recently. Tapestry isn’t my ho…
I tried to include as many original features as I found in the kimono silk, like this original 1980s Japanese price tag. I tacked this one in place with a couple of hand stitches, in case it fell off over time.
If you’ve made it this far, thank you for following me on this journey! I made enough of the quilted fabric to make a second bag, which I’m going to gift to Moira to say thank you for all the beautiful fabric. I’ll share that one on my Instagram, since it won’t require an entire second blog post about the exact same project! This bag really felt like a piece of art crossed with a practical sewing project, wearable art that has documented the last few years of my life. I love that feeling, I’d like to incorporate more of that into my craft practice in the future.









I love it! If that corner really bothers you, you could turn it inside-out to tack the excess in the inside. It would still be a squared off corner but the extra fabric would be in the inside.
This is SO cool!! I really want to try this net/quilting method to use up some fabric scraps and a tote bag seems like the perfect use for that!